How to Set Up DeepSeek on Janitor AI (2026 Step-by-Step Guide)
July 17, 2026
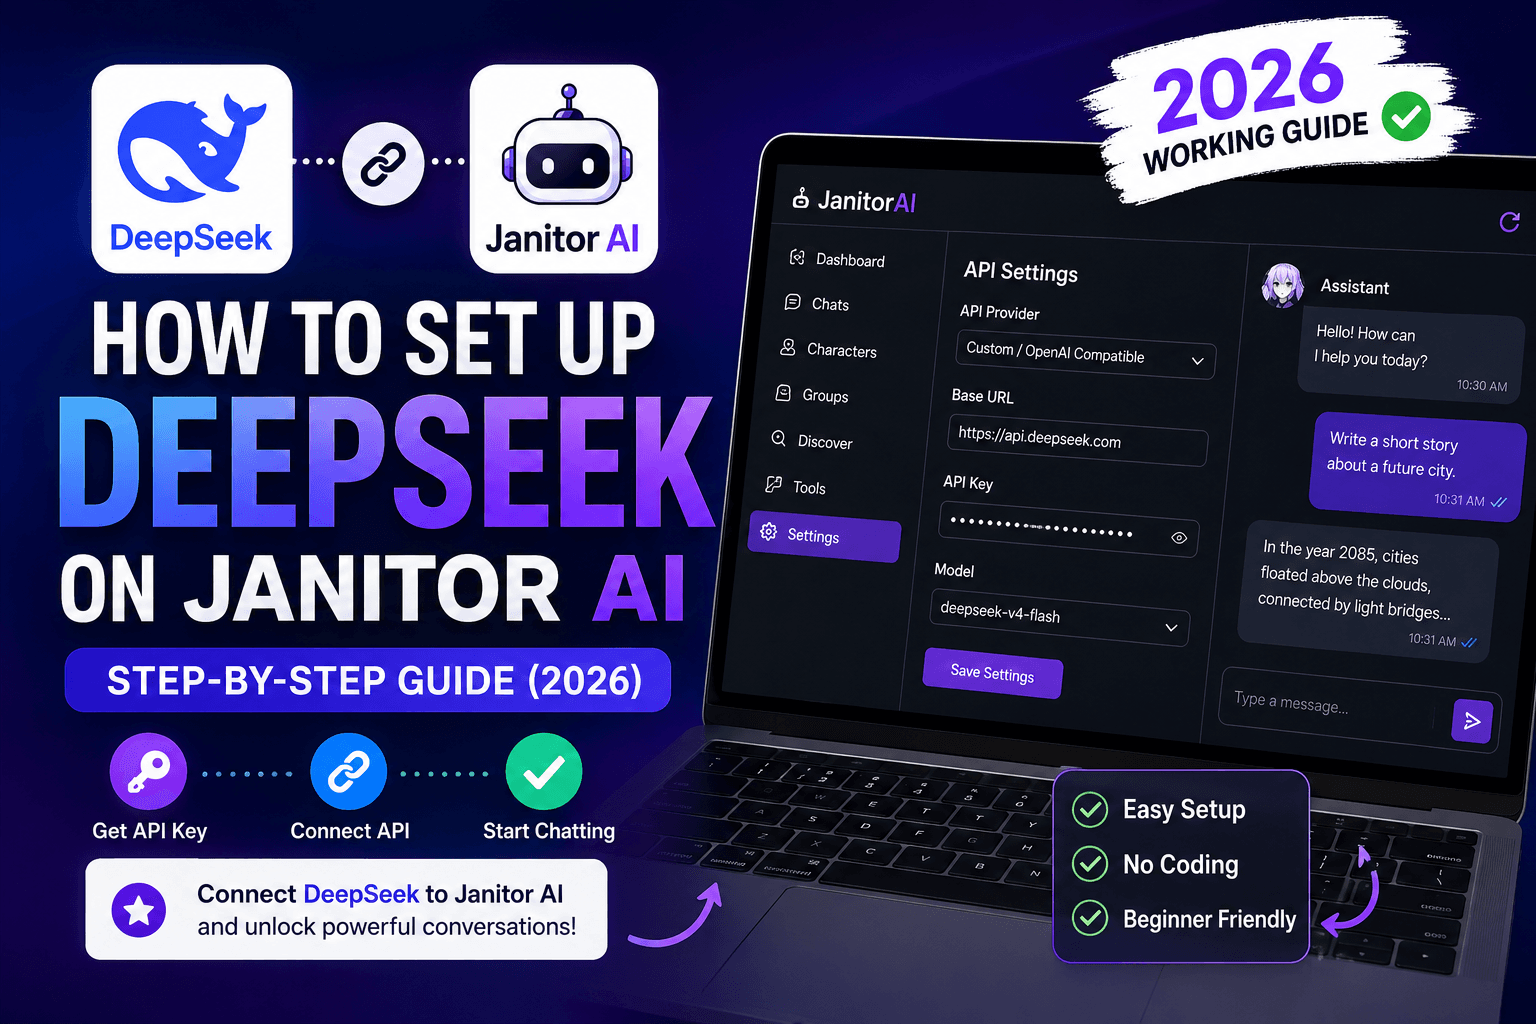
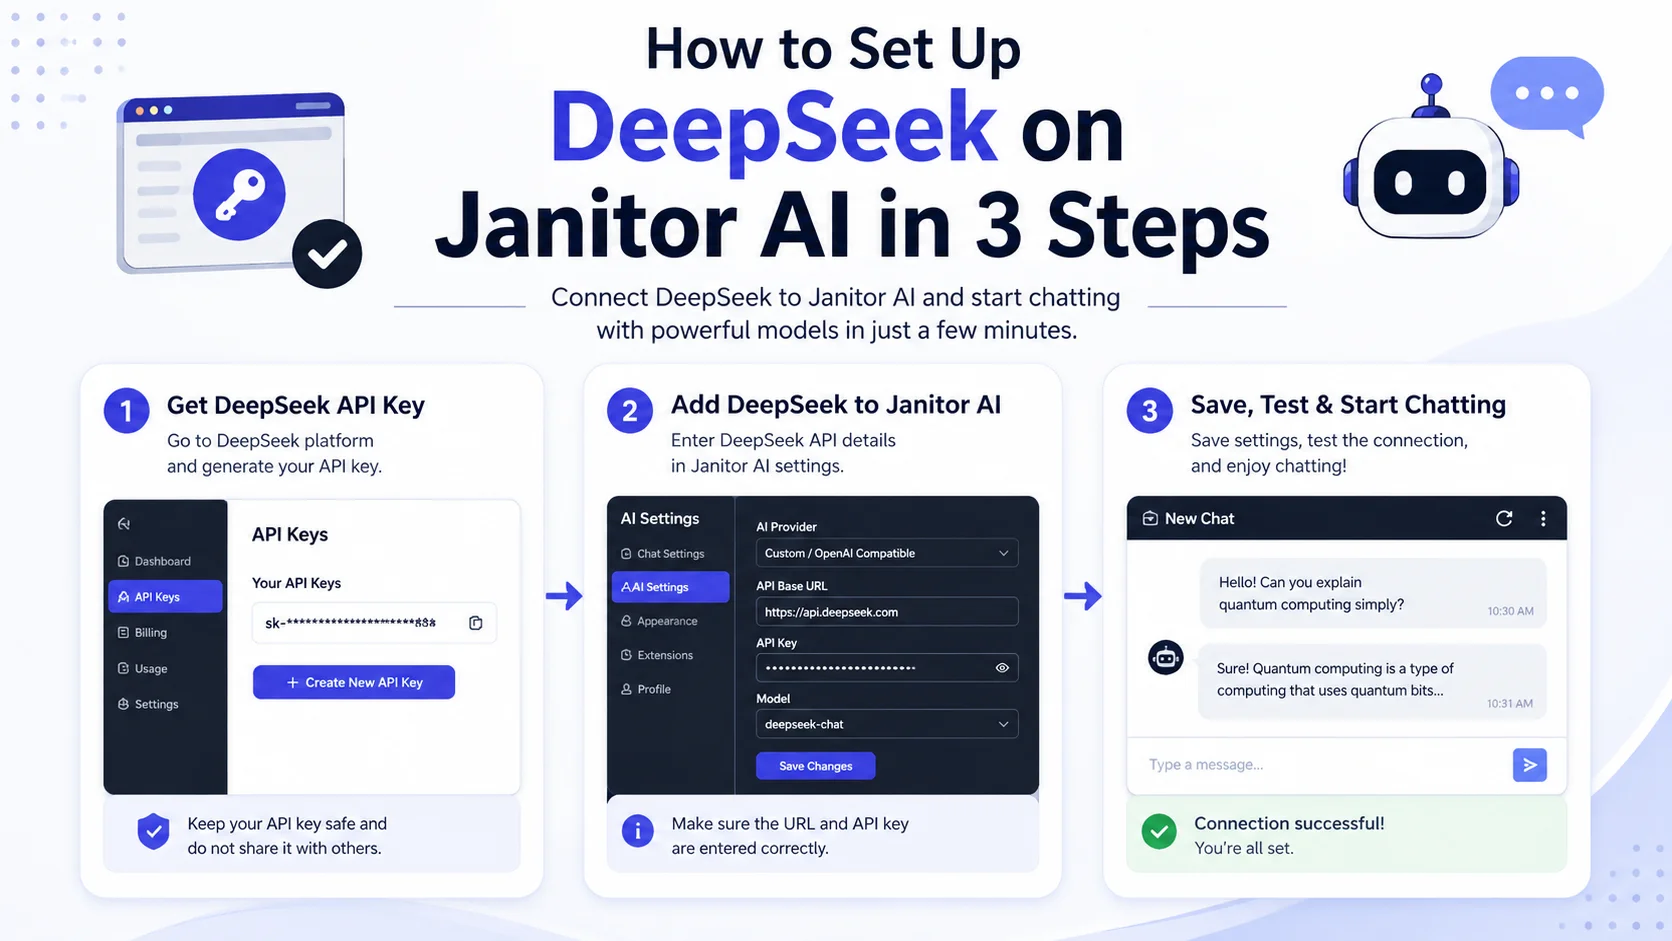
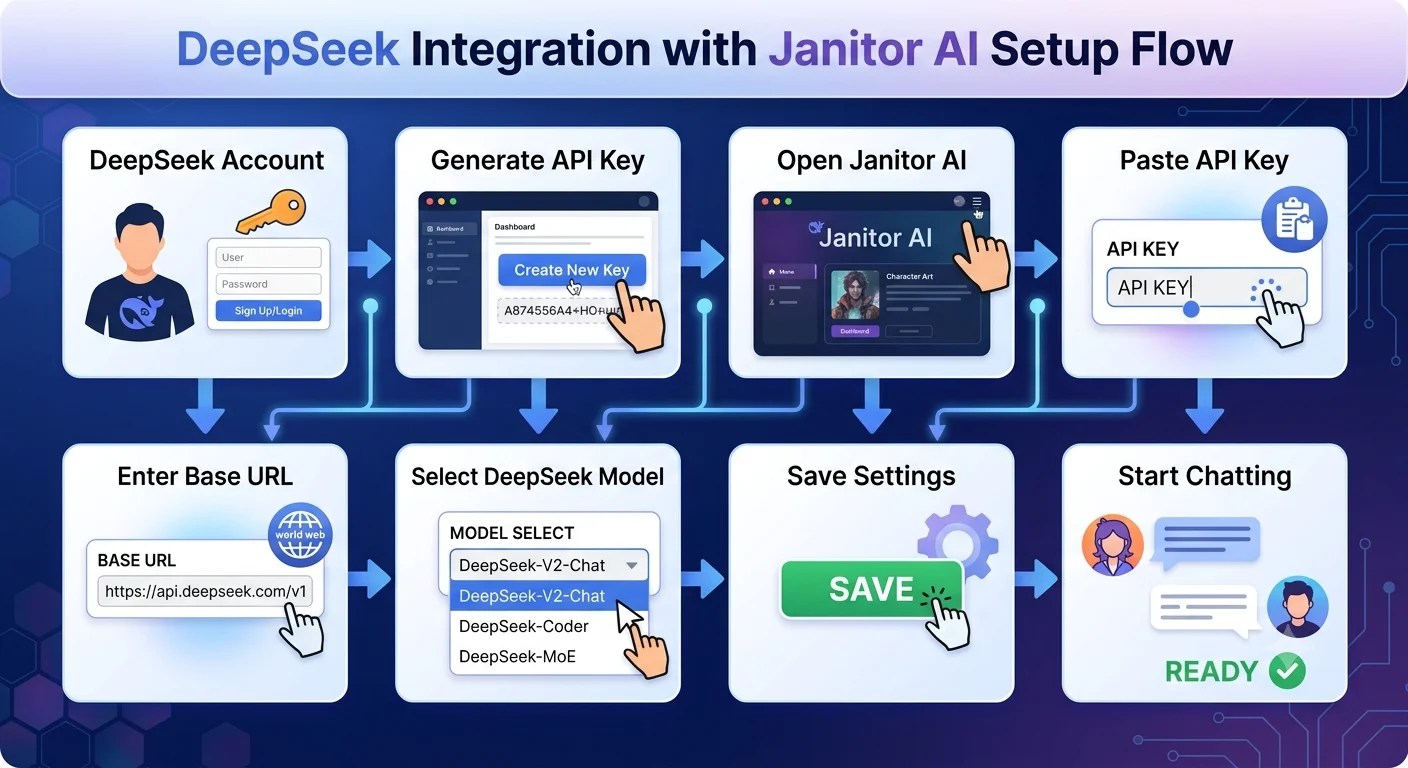
If you’re wondering how to set up DeepSeek on Janitor AI, the process is straightforward. Create a DeepSeek API key, open Janitor AI > API Settings, choose a Custom/OpenAI-Compatible API, enter the correct Base URL, paste your API key, select a supported DeepSeek model, save the settings, and test the connection with a simple prompt.
The most common setup mistake is mixing a DeepSeek API key with an OpenRouter endpoint. Always make sure your API key, Base URL, and model belong to the same provider.
How to Set Up DeepSeek on Janitor AI Without Errors
You finally have your DeepSeek API key.
You open Janitor AI, navigate to the API settings, and suddenly you’re faced with fields like Base URL, Endpoint, Model Name, and API Key. If you’re new to AI integrations, it’s easy to feel overwhelmed.
The good news? Connecting DeepSeek to Janitor AI usually takes less than five minutes once you understand what each setting does.
Unlike many tutorials that tell you what to paste where, this guide explains why each step matters, highlights the most common mistakes beginners make, and includes practical tips to help you get everything working on the first try.
Whether you’re using Janitor AI for roleplay, creative writing, coding assistance, or character conversations, this tutorial will walk you through the complete setup process in a beginner-friendly way.
Who Is This Guide For?
✔ First-time Janitor AI users
✔ Beginners who have never used an API before
✔ Users switching from OpenAI or OpenRouter
✔ Anyone getting API connection or authentication errors
Before You Begin: A Quick Setup Checklist
Before changing any settings in Janitor AI, make sure you have everything ready.
Pro Tip: Open both the DeepSeek dashboardand Janitor AI in separate browser tabs. Switching between them makes the setup process much faster.
Understanding the Three Things That Matter Most
Many tutorials jump directly into the settings page without explaining what you’re actually configuring.
Understanding these three items will save you a lot of troubleshooting later.
1. What Is an API Key?
Think of an API key as a secure password.
Instead of logging into DeepSeek every time Janitor AI needs to generate a response, it uses this unique key to communicate securely with DeepSeek’s servers.
Without a valid API key, Janitor AI cannot generate responses.
Important: Never share your API key publicly or include it in screenshots. Anyone with access to your key may be able to use your account.
2. What Is the Base URL?
The Base URL tells Janitor AI where to send your requests.
You can think of it as the address of DeepSeek’s servers.
If this address is incorrect, Janitor AI won’t know where to send your prompts.
Many beginners accidentally paste the wrong endpoint or copy an outdated URL from an old YouTube tutorial.
3. What Is the Model Name?
The model determines which version of DeepSeek answers your prompts.
Different models are optimized for different tasks.
For example:
Fast conversations
Coding
Long-form writing
Advanced reasoning
Choosing the right model can noticeably improve both speed and response quality.
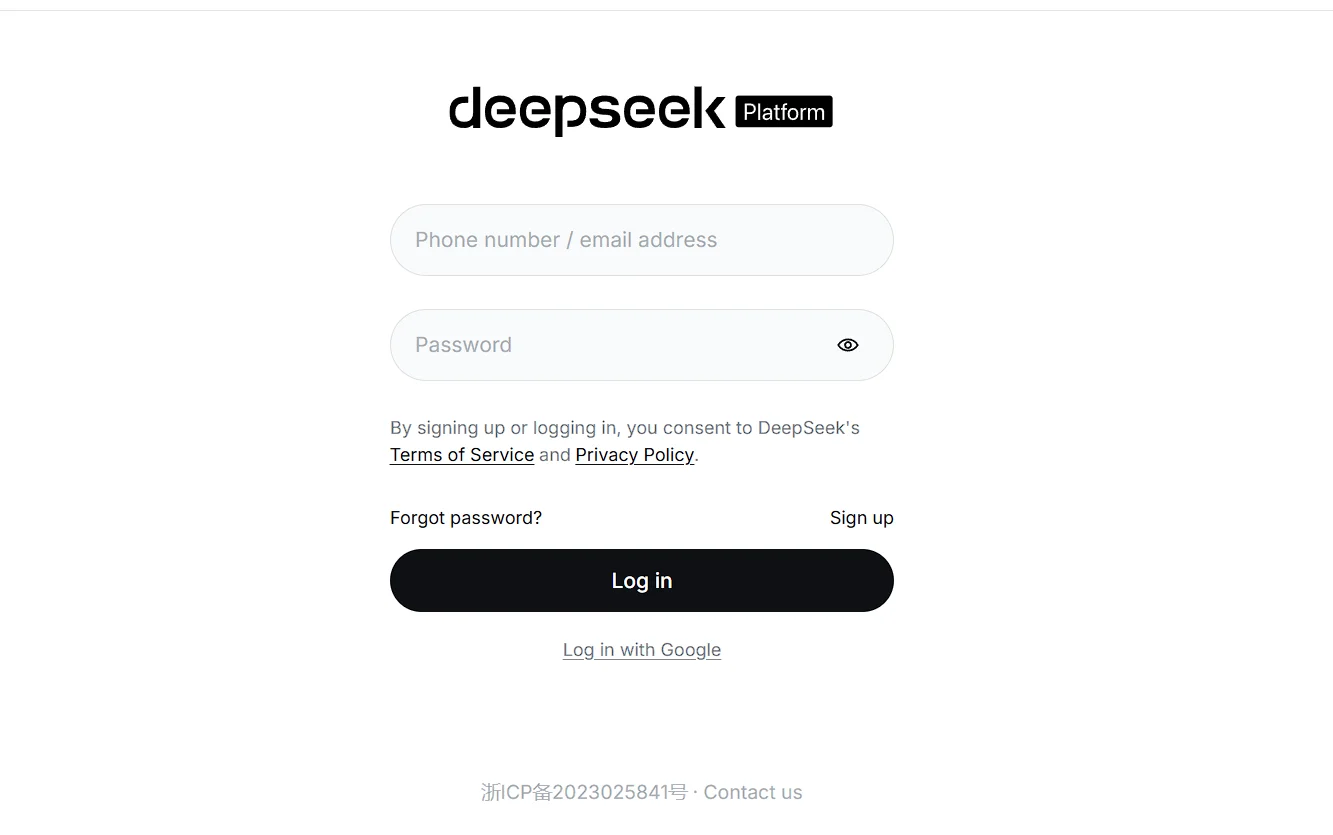
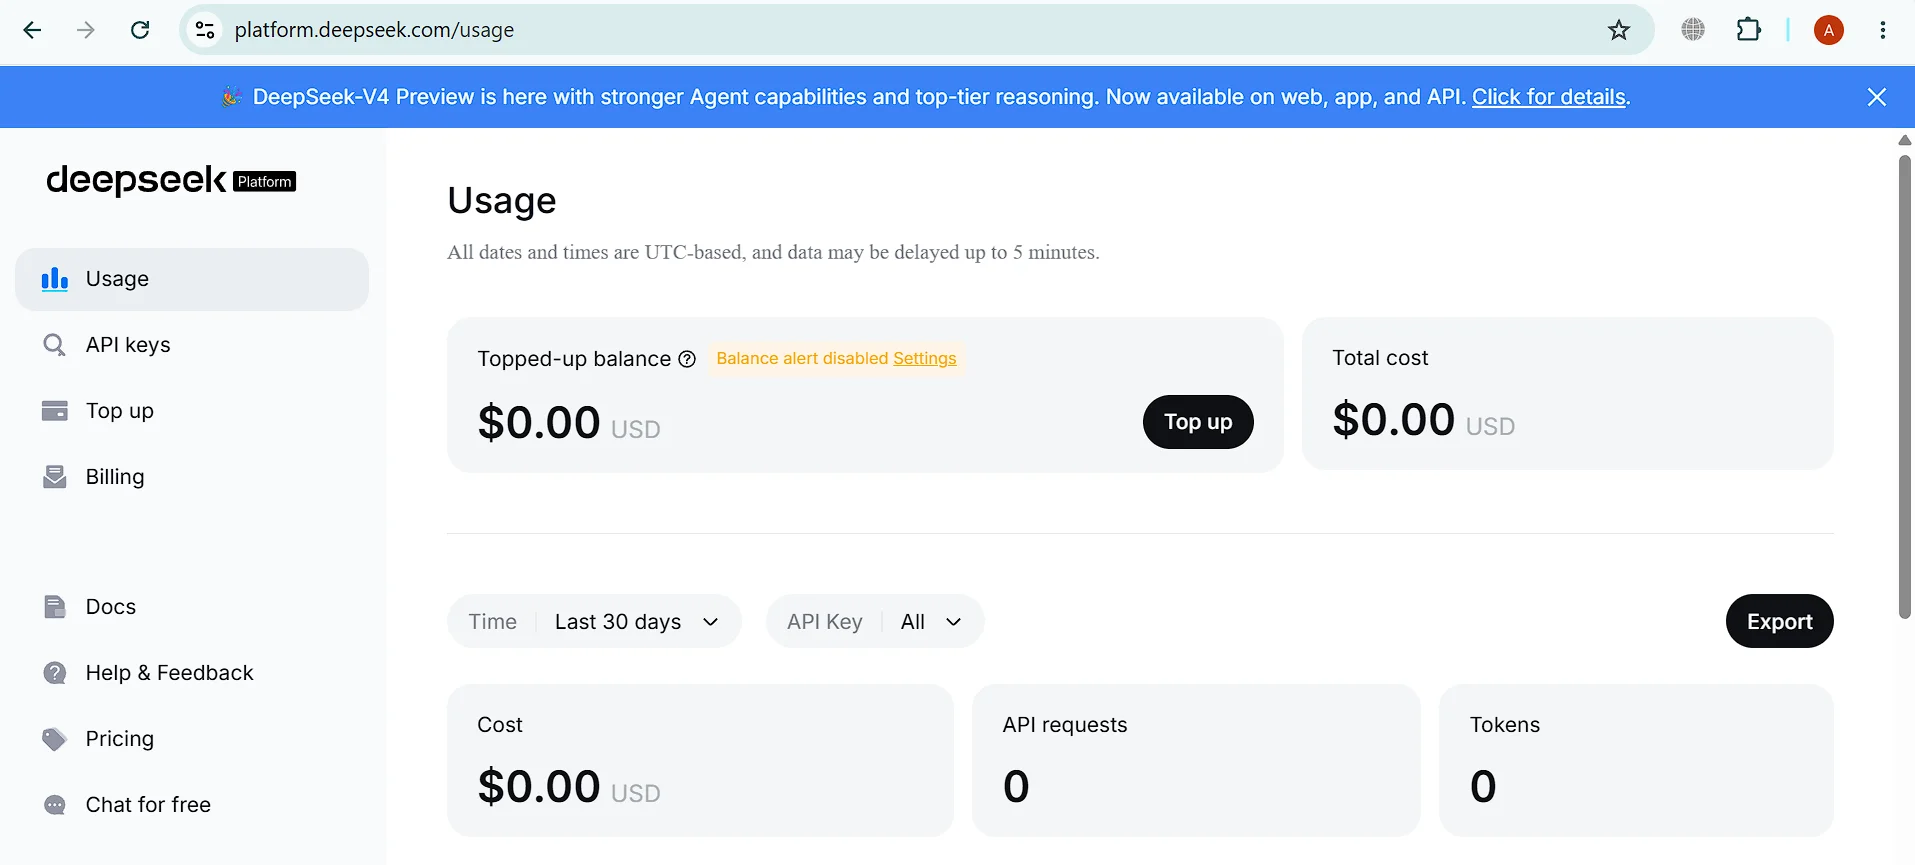
This dashboard is where you’ll generate and manage your API keys.
Beginner Tip
Don’t create multiple accounts unless necessary. Keeping all your API keys in one account makes billing, usage tracking, and key management much easier.
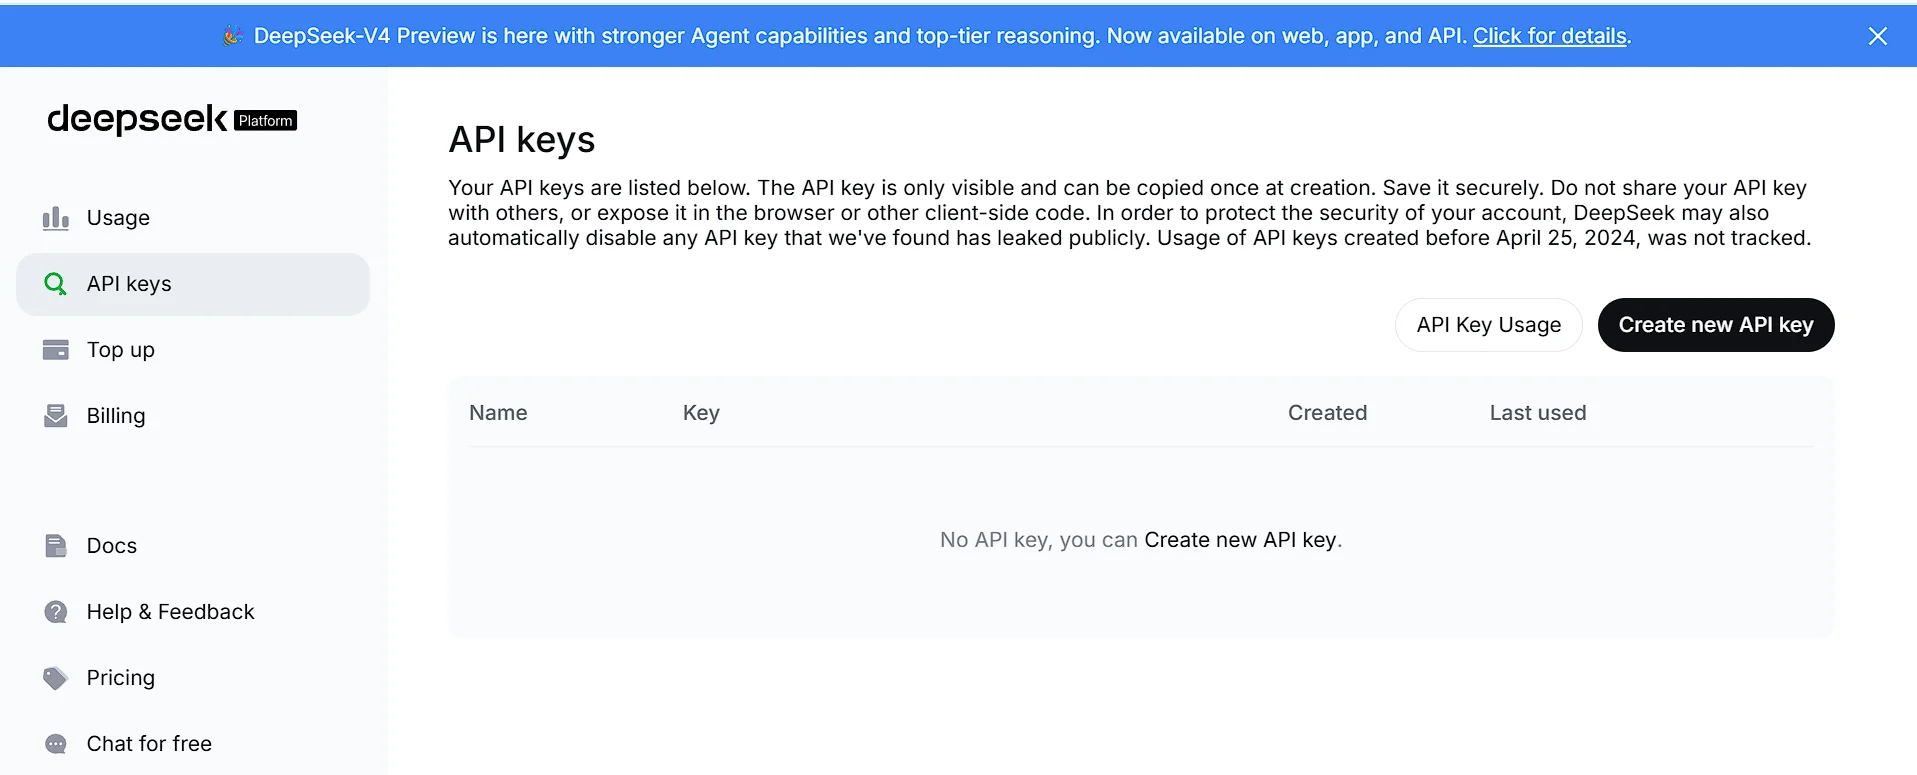
Step 2 — Generate Your DeepSeek API Key
DeepSeek API key generation dashboard
Now it’s time to create the most important part of the setup: your API key.
Inside the DeepSeek dashboard:
Navigate to API Keys.
Click Create New API Key.
Give your key a descriptive name, such as Janitor AI.
Copy the generated key immediately.
Save it somewhere secure.
Most platforms only display a newly created API key once. If you lose it, you’ll usually need to generate a new one.
DeepSeek API key generation dashboard
Common Beginner Mistake
Copying extra spaces before or after the API key.
Even a single hidden space can cause an authentication error when connecting to Janitor AI.
A good habit is to paste the key into a plain text editor first to ensure it hasn’t picked up any unwanted formatting.
Pro Tip
Instead of naming your key “New API Key,” use descriptive names like:
Janitor AI
Coding Assistant
Testing
Personal Projects
This makes future management much easier if you create multiple keys.
Step 3 — Open Janitor AI and Prepare a Test Chat
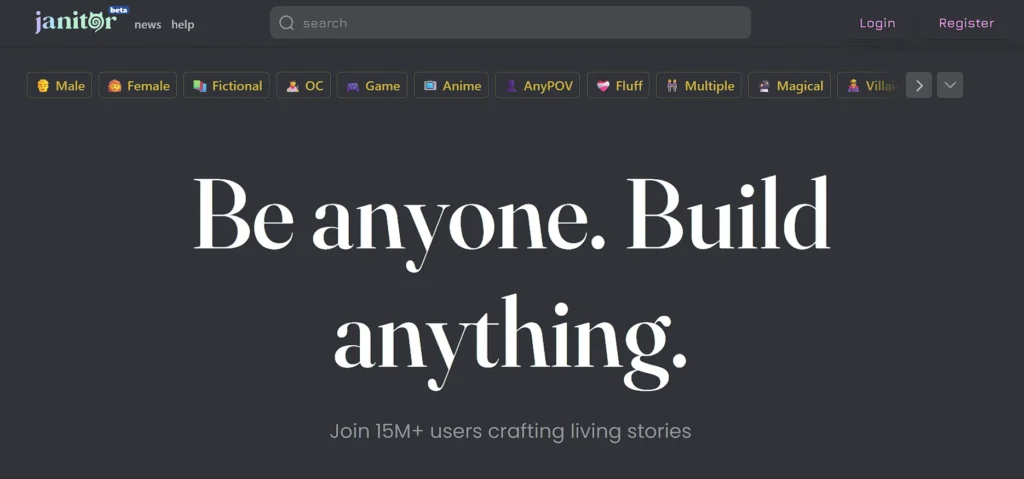
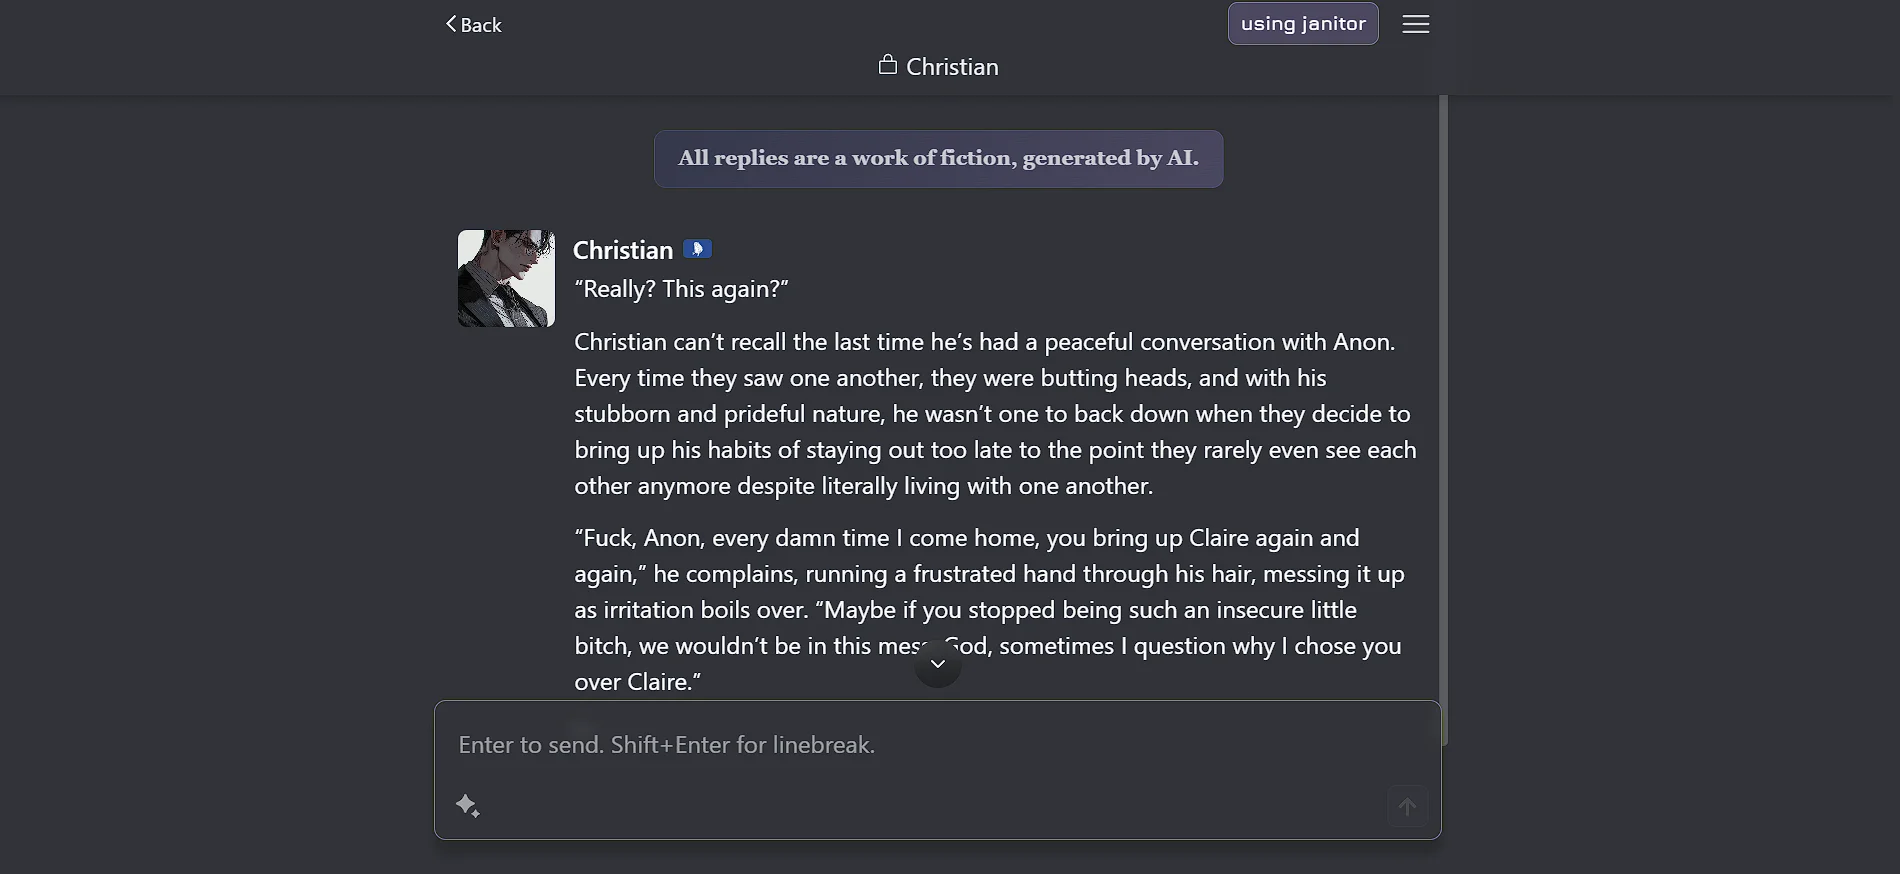
Janitor AI dashboard
Log in to your Janitor AI account.
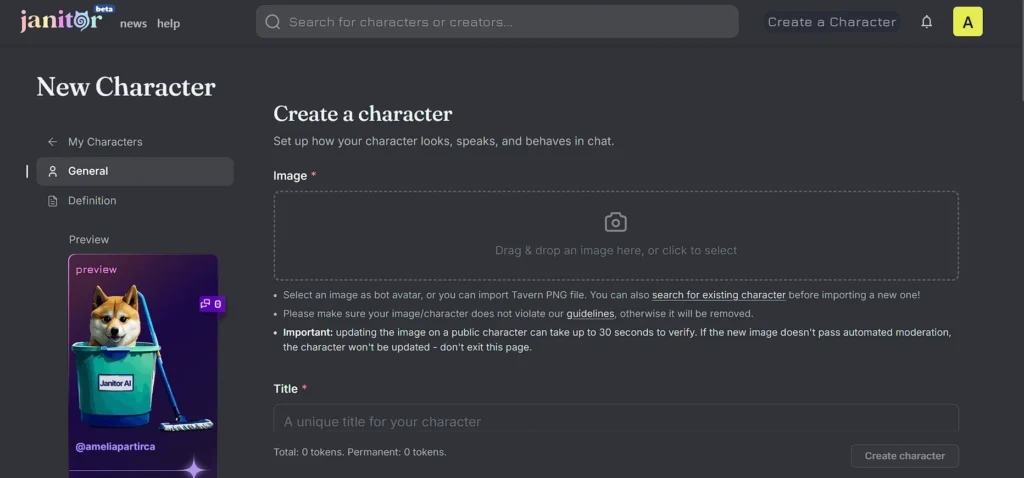
Rather than opening the settings menu immediately, select a character or create a new chat first.
Why?
Many versions of Janitor AI expose API settings directly in the chat interface rather than in a separate developer dashboard.
Creating a test conversation also lets you verify the connection as soon as the setup is complete.
What You’ll Be Looking For
Depending on the version of Janitor AI you’re using, you may see options such as:
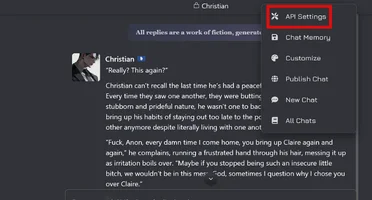
API Settings
AI Settings
Proxy Settings
Model Settings
Custom API
OpenAI-Compatible API
Don’t worry if the wording is slightly different. The functionality is usually the same.
Janitor AI Character
Step 4 — Open the API Settings
Once you’re inside Janitor AI, locate the settings area where external AI providers can be configured.
At this stage, don’t paste anything yet. First, double-check that you’re editing the correct provider settings.
Common Mistake
Many users accidentally configure an OpenRouter profile while using a DeepSeek API key. Since the API key, Base URL, and model must all come from the same provider, mixing them will almost always result in connection errors.
Step 5 — Connect DeepSeek to Janitor AI
Now that you have your API key and the API settings page open, it’s time to connect Janitor AI to DeepSeek.
This is the step where most setup errors happen. The reason isn’t usually a bad API key—it’s entering the wrong combination of API key, Base URL, and model.
Think of these three settings as a matching set. If one belongs to a different provider, the connection won’t work.
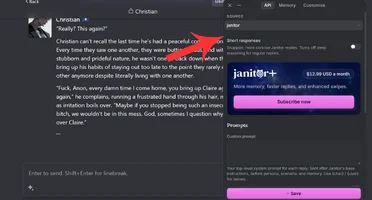
Enter Your API Key
Locate the API Key field in Janitor AI and paste the key you copied from your DeepSeek dashboard.
Before clicking Save, double-check that:
There are no extra spaces before or after the key.
You’re using a DeepSeek API key, not one from another provider.
The key hasn’t been revoked or regenerated.
Pro Tip: If the API key field includes a “Show” icon, use it briefly to confirm you’ve pasted the entire key correctly, then hide it again for security.
Selecting DeepSeek model in Janitor AI
Enter the Correct Base URL
The Base URL tells Janitor AI where to send your prompts.
Depending on your setup, you’ll see either a Base URL field or a Full Endpoint URL field. Don’t confuse the two.
Typical Configuration
Base URL
Official DeepSeek API base URL
Full Endpoint
Official DeepSeek chat completions endpoint (only if the interface specifically asks for a full endpoint)
Important: Never paste a full endpoint into a Base URL field unless the interface explicitly requests it.
Choose the Correct DeepSeek Model
Once the API key and URL are configured, you’ll need to select a model.
Choosing the right model depends on what you plan to do with Janitor AI.
Flash Model
Faster replies
Every day chat, roleplay, casual conversations
Pro Model
Better reasoning
Story writing, coding, planning, and complex characters
Which One Should Beginners Use?
If you’re new to Janitor AI, start with the Flash model.
It generally provides:
Faster responses
Lower usage costs (where applicable)
Smooth conversations
Reliable roleplay performance
You can always switch to a more advanced model later if you need deeper reasoning or longer responses.
Step 6 — Save Your Settings
After entering your API key, Base URL, and model:
Click Save.
Wait a few seconds.
Refresh the Janitor AI page.
Many users skip the refresh step and assume the setup failed, even though the new configuration hasn’t been loaded yet.
Beginner Mistakes to Avoid
Don’t change every setting at once.
Some users immediately modify:
Temperature
Max Tokens
Memory
Context Length
Streaming
If something stops working, it becomes difficult to identify the real cause.
Instead:
Save the connection.
Test it.
Adjust advanced settings afterward.
Step 7 — Test Your Connection
With everything saved, it’s time to confirm the connection is working.
Use a simple prompt first, such as:
“Reply with one sentence if you’re connected correctly.”
If you receive a response within a few seconds, congratulations—your setup is working.
Once you’ve verified the connection, you can begin using more detailed prompts for roleplay, writing, coding, or brainstorming.
What If Nothing Happens?
Don’t panic.
A blank response doesn’t always mean your setup is broken.
Start by checking:
Is the API key correct?
Is the Base URL entered in the correct field?
Does the selected model belong to the same provider?
Did you save and refresh the page?
Most issues are resolved by correcting one of these settings.
Direct DeepSeek vs OpenRouter
One of the biggest sources of confusion is deciding whether to connect Janitor AI directly to DeepSeek or use a service like OpenRouter.
For most beginners, Direct DeepSeek is the better starting point because it reduces the chances of configuration mistakes.
Recommended Settings for Better Conversations
Once your connection is working, you can fine-tune the experience.
Temperature
Medium
Balances creativity and consistency
Max Response Length
Moderate
Avoids overly short or excessively long replies
Context Length
Medium
Maintains conversation history without slowing responses
Streaming
Enabled (if available)
Makes replies appear faster
Remember, there isn’t one perfect configuration for everyone. If you’re writing stories, you may prefer more creative settings, while coding tasks often benefit from more consistent outputs.
Pro Tips for Better Results
✔ Start with short prompts when testing.
✔ Create separate chats for unrelated topics to keep conversations focused.
✔ Keep your API key private and regenerate it immediately if you suspect it has been exposed.
✔ Update your browser regularly to avoid compatibility issues.
✔ If replies seem unusually slow, try reducing the conversation context or switching to a faster model.
Quick Success Checklist
Before moving on, confirm that you’ve completed each of these steps:
Created a DeepSeek account.
Generated a valid API key.
Opened Janitor AI API settings.
Entered the correct Base URL.
Selected a compatible DeepSeek model.
Saved the configuration.
Refreshed Janitor AI.
Successfully tested the connection.
If every box is checked, your DeepSeek integration should now be ready for everyday use.
Troubleshooting: DeepSeek Not Working on Janitor AI?
Even if you’ve followed every step carefully, you might still run into an error. The good news is that most connection problems stem from a few common mistakes and can usually be fixed within minutes.
Before changing multiple settings, identify the exact issue first. Troubleshooting one setting at a time makes it much easier to find the root cause.
Verify that you’re using the correct URL for your chosen provider.
404 Not Found
Wrong model name or endpoint
Double-check the selected model and API configuration.
429 Rate Limit Exceeded
Too many requests in a short time
Wait a few minutes before sending another request.
500 Internal Server Error
Temporary provider issue
Retry after a few minutes.
No Response
Connection isn’t configured correctly
Save settings again and refresh Janitor AI.
Slow Replies
High server load or long context
Reduce conversation length or choose a faster model.
Expert Tip: More than half of setup issues happen because users accidentally combine a DeepSeek API key with another provider’s endpoint. Keep your API key, Base URL, and model from the same provider.
Five Common Mistakes Beginners Make
Learning how to set up DeepSeek on Janitor AI becomes much easier once you know what not to do.
Mixing Different Providers
A DeepSeek API key only works with DeepSeek’s own configuration. If you’re using OpenRouter, use its endpoint, API key, and model together.
Using an Old Model Name
Some tutorials on YouTube or Reddit still mention outdated model names.
Always use the latest model available in your provider dashboard, rather than copying settings from an older guide.
Forgetting to Refresh Janitor AI
Many users save their settings but never reload the page.
Refreshing the chat ensures Janitor AI loads your new configuration.
Testing with Complex Prompts
Avoid sending a long roleplay prompt immediately after setup.
Instead, use a simple message like:
“Reply with one sentence if you’re connected correctly.”
If that works, your connection is successful.
Exposing Your API Key
Never:
Share screenshots containing your API key.
Post your API key online.
Paste it into public chats.
Treat it like your password.
Best Settings for Roleplay and Character Chats
Once your connection is working, you can optimize Janitor AI for better conversations.
Temperature
Medium (around 0.7–0.9)
Creates natural and creative conversations.
Context Length
Moderate
Keeps conversation history without slowing responses.
Max Response Length
Medium
Produces detailed but manageable replies.
Streaming
Enabled
Makes responses appear more quickly.
There isn’t a universal “perfect” configuration. Experiment with small adjustments after confirming your API connection is stable.
Direct DeepSeek vs OpenRouter: Final Recommendation
Many users ask which integration method is better.
Here’s a simple decision guide.
Easiest setup
✅ Direct DeepSeek
Multiple AI models
✅ OpenRouter
Less troubleshooting
✅ Direct DeepSeek
More flexibility
✅ OpenRouter
Best option for beginners
⭐ Direct DeepSeek
If this is your first API integration, start with Direct DeepSeek. Once you’re comfortable with the setup process, you can explore other providers if needed.
Security and Privacy Tips
Connecting an external AI model also means you’re responsible for protecting your account.
Follow these best practices:
Never publish your API key.
Rotate or regenerate keys if you suspect they’ve been exposed.
Avoid entering passwords, banking details, or sensitive personal information into AI chats.
Review your API usage regularly if your provider charges based on requests.
Use official dashboards whenever possible.
Good security habits help prevent unauthorized usage and unexpected costs.
Final Setup Checklist
Before you start using DeepSeek with Janitor AI, verify each of these items.
DeepSeek account created
API key generated
Correct Base URL entered.
Correct DeepSeek model selected
Settings saved
Janitor AI refreshed
Test message successful
If every item is checked, your setup is complete.
Frequently Asked Questions
Can I use DeepSeek on Janitor AI for free?
Some providers offer limited free access, while others charge based on API usage. Check your provider’s pricing before sending large numbers of requests.
Do I need programming experience?
No.
Everything is done through the Janitor AI settings page by copying and pasting the required information.
Why does my API key keep failing?
The most common reasons include:
Copying extra spaces
Using an expired key
Mixing providers
Entering the wrong Base URL
Which DeepSeek model should beginners use?
A fast chat-focused model is usually the best starting point because it provides quick responses and is easy to test.
Can I switch models later?
Yes.
You can update your selected model at any time through the API settings without creating a new account.
Is OpenRouter required?
No.
You can connect Janitor AI directly to DeepSeek without using OpenRouter.
Is DeepSeek good for roleplay?
Yes.
Many users prefer DeepSeek because it produces natural conversations, creative storytelling, and consistent character responses when configured correctly.
How do I know the setup worked?
Send a short test message after saving your settings.
If you receive a response without any errors, the connection is working.
Does changing temperature improve responses?
Yes, but only after your API connection is working properly.
Avoid adjusting advanced settings until you’ve confirmed the integration is successful.
Is it safe to use DeepSeek with Janitor AI?
Yes, as long as you use official APIs, protect your API key, and avoid sharing sensitive personal information in conversations.
Final Verdict
Setting up DeepSeek on Janitor AI isn’t difficult—it simply requires the right combination of an API key, a Base URL, and a model. Once these three elements match, the integration usually takes only a few minutes to complete.
Instead of experimenting with random settings from outdated tutorials, start with a clean configuration, test it using a simple prompt, and then fine-tune your preferences for roleplay, writing, or productivity. This approach saves time and avoids the most common setup errors.
Whether you’re using Janitor AI for immersive character chats, brainstorming ideas, or creative storytelling, DeepSeek offers a capable and flexible option when configured correctly.
Hazel Patrica is a Technology Writer and Editor at Emerson FRP Tools. She covers AI tools, software reviews, technology trends, tutorials, and digital innovation. Her goal is to simplify complex technology topics and provide clear, practical information that helps readers make informed decisions in the digital world.
Cookies are small text files that can be used by websites to make a user\'s experience more efficient. The law states that we can store cookies on your device if they are strictly necessary for the operation of this site. For all other types of cookies we need your permission. This site uses different types of cookies. Some cookies are placed by third party services that appear on our pages.
Necessary cookies help make a website usable by enabling basic functions like page navigation and access to secure areas of the website. The website cannot function properly without these cookies.
Marketing cookies are used to track visitors across websites. The intention is to display ads that are relevant and engaging for the individual user and thereby more valuable for publishers and third party advertisers.
Preference cookies enable a website to remember information that changes the way the website behaves or looks, like your preferred language or the region that you are in.